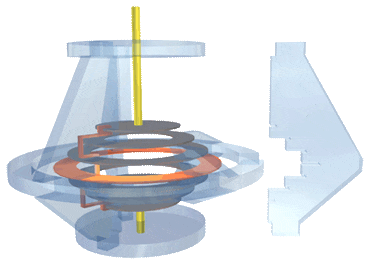
Array Assembly Guide for Older QEnergySpa/BEFE Array 2000 Water Module
Table of Contents
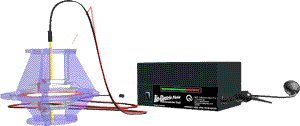
 The Array Assembly Guide for the Array 2000 (water module) was QtheExperience’s second mainstream Array, it was shipped with the B.E.F.E. power supply model numbers: 3006, 3024B, 3024D, and 2100s.
Below are the step-by-step Array Assembly Instructions on how to change the Rings and Track.
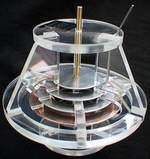 Are you still using an original import: The BEFE (Bio-Electric Field Enhancer)? Here are some instructions on how to replace the plates and track. Water conditions play a large role in the erosion of the positive plates and tracks. For this reason, it is very difficult to put a time frame on when to replace. The easiest way to determine when to change the positive plates and track is to take a close inspection. Place your finger on the positive plates and track, if it bends, replace it as the metal has deteriorated. When replacing plates or taking the ORB apart please read the manual carefully & check the ORB quick reference guide.
PLEASE NOTE:
When reassembling the Array (pictured) or the Orb, always ensure the top positive ring is sitting on and touching the Positive track. The cable connector hood is fitted flush with the orb. The diagrams below represent one of our initial array creations. However, the assembly is still the same.
Prior to Array assembly or disassembly:
Visually inspect each part in bright light. Look for cracks or any broken pieces on all acrylic and metal parts. Check the cable to be sure that it has no cracks, cuts, or crimps. Check for any abrasion on the cable. The QEnergySpa Array is a precise and fragile electronic piece of equipment. Because of its unique assembly, it is wise to assemble or disassemble it in bright light. This will allow you to view the preciseness of each and every part prior to use.
It Helps To Be…
Careful. The care you take in the assembly or disassembly of these delicate precision instruments will preserve them for years to come. Once you understand how fragile and precise the acrylic parts are, you will appreciate your patience spent on taking care of your QEnergySpa. It is also extremely important to assemble and disassemble DRY components. It’s easy to slip and mishandle the wet parts. They break easily. They are precision made to fit perfectly.
B.E.F.E. Array Assembly Guide
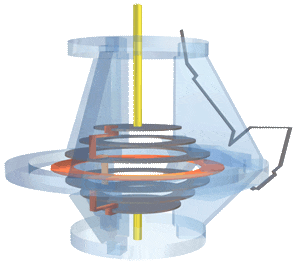
Step 1
Remove the stainless steel track by un-clipping it from the bottom positive ring. Swinging it outwards at an angle and sliding it downwards to remove it from the top acrylic plate.
Step 2
Gently slide the removable leg out (it is safer and easier to do this if the Array is on a table or flat surface). The 2 positive rings (the degraded pair) may or may not come out with the leg when you remove it. If not, gently slide them out horizontally.
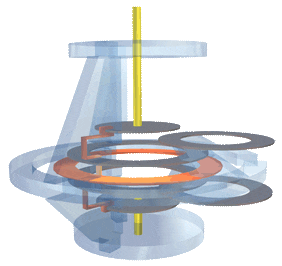
Step 3
Slot the new plates into the existing slots followed by gently sliding the leg back into place. Be sure to align the plates correctly with the appropriate slots on the other legs. If it does not go back together easily, DO NOT force it! Double-check to make sure that the plates are seated correctly and that there are no obstructions.
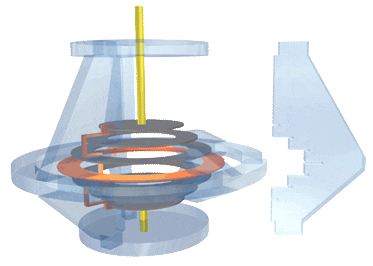
Step 4
Finally, slot the top of the track into the slot at the top of the Array. As you slide it into place, the section marked “A” should be on top of the top newly inserted plate and “B” should be underneath the bottom newly inserted plate. The track should audibly click’ into place.
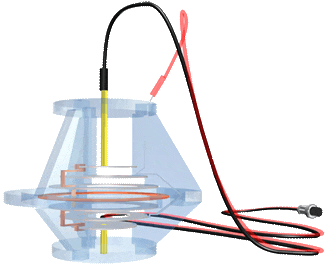
Clipping Cable onto the Array Assembly
The end of the cable that attaches to the array has two connectors or clips. The negative one is black in color and round in shape. This fits onto the round rod located in the center protruding from the top of the array. The other is red and square. This fits onto the flat metal track on the outside of the top of the Array.
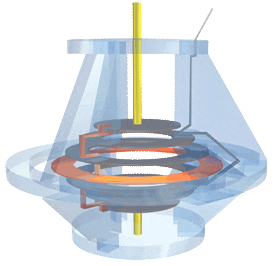
Completed Array Assembly
Are you still not sure and need some help? I am always available to help.
Please feel free to give me a call: Debbie at 319-208-1929
Genuine QEnergySpa Parts | QEnergySpa Footbath
Orb Ring and Track Sets | How to “Q”
Orbs and Cables | Array Cables | Fuses
Display all QEnergySpa Products Look here.
You may always contact us with any questions or part requests. We are here to help you set up your session. Nothing looks and performs like a genuine QEnergySpa Footbath. For that reason, Pros insist on them. Do you need spare parts for your QEnergySpa Footbath? Does your orb or array have a broken or missing part also? Then you have found the right place. Q2Spa.com Online Since 2002
Genuine QEnergySpa Parts | Orbs and Cables
Fuses | Array Parts | Orb Ring and Track Sets
Solid, untreated, unvarnished copper tubs
The statements on this site have not been evaluated by the FDA.
These products are not intended to treat, cure, or prevent any disease.
